Update from the 2017 trip: the video digitizing project has stalled due to financial woes at the UBC. I'll provide updates as this changes.
Uganda 2018 - Scanning the Film Negatives of
Idi Amin’s Official Photographer
If you have read my other blog entries, you will remember that I first
visited the Uganda Broadcasting Corporation (UBC) in Kampala, Uganda in June of 2017 with Dr. Derek Peterson to consult with them about their aging library of U-Matic videotapes. It was during this trip that we found the filing cabinet contining the film negatives.
In January 2018 I went back to the UBC.
I went to set up a scanning operation with the goal of scanning the (mostly medium format) film negatives taken by ID Amin’s official photographer.
When we first found them in a metal filing cabinet during that 2017 visit, they looked like this:
 |
| Dr. Derek Peterson investigating the negative cabinet with Jacob Noowe. |
First I have to let you know who made this possible. At the UBC there was Managing Director Winston Agaba, Administrator Madame Elizabeth Bigirimana, Records Assistant Malachi Kabaale, and Librarian Jacob Noowe. The two Makerere graduate students that will be doing the work are Jimmy Kikwata and Edmund Mulinda. Dr. Edgar Taylor of the US is supervising the work locally as well as prioritizing the work based on his evaluation of each image's importance. Finally, Dr. Derek Peterson acquired the funding from the UM African Studies Center African Heritage & Humanities Initiative and is generally supervising the project from the USA.
Here is a photo of the team in Uganda.
 |
| Jimmy, Edmond, Jacob, Edgar, and Malachi. You can see our setup on the right. |
Before traveling to Uganda, I had spec’ed out, purchased, tested, and labeled all the parts for this operation.
These included a new MacBook Air, an Epson V800 flatbed scanner, 2 external hard drives (one for data, one for daily backup) and various archival cotton gloves and cleaning supplies. Derek was able to safely pack all this into his suitcases and took it to Kampala in January 2018 to await my arrival.
A quick aside: I researched various ways to do this scanning, including using a
wet scanning process. I decided that for this project that taking care to keep the scanner and film holders clean and
making sure the negatives were clean would be the most sustainable workflow.
Getting Started - Our working space
We were expecting to be given a small desk in the room in which we found the filing cabinet (photos below). It would have been difficult to make it work, but a space is always at a premium in institutions like the UBC in a building like this we were ready to deal with it.
Imagine my surprise when I found out we were to get an entire room - a room that we had never been in before, but that was right next door to the storage room with the negatives. UM had provided the funding for the gear, my travel, and wages for the 2 Makerere University grad students that were to do the work, so it was great to see the UBC supporting this project so strongly.
 |
| This was the room when we first saw it. That carpet was once red. |
The problem was that it had not been used in many years, and apparently had not been cleaned much during that time. It needed some serious work:
- The remaining gear needed to be removed
- The windows and walls needed to be cleaned and sealed
- The excess wire had to be put out of the way
- Dangerous gaps in the sections of the wall needed to be covered
- The unscreened air vents from the atrium had to be covered and made airtight
- And that all needed to happen before general cleaning of the room
- And cleaning or covering of the existing carpet
But as long as we were asking, would it be possible to also:
- replace the carpet
- add window blinds
- and get one of the AC units working to protect the negatives?
And we only had 4 days before I was to leave Uganda.
While work started on that room, we set up the gear in a different room in a different building where a group of PCs recorded the UBC radio broadcasts all day. It was air conditioned to keep the machines happy, and that worked well for our needs. Hot & humid are the enemies of film.
Training started on Tuesday (using some film negatives I had brought from home) and would continue through Wednesday. We had to set up in our permanent space on Thursday - no matter what shape it was in - so we could move in the negative cabinet, sort it out and start staging the real workflow, and start doing this work for real: the Makerere students had to understand how to do this work before I left at the end of the day Friday.
Let me be clear: I had very tempered expectations about what could be accomplished with regard to cleaning up this room given the time and other constraints.
But in only three days the room was transformed!
It was completely cleaned, had new carpet & window blinds, a working AC unit, and furniture! All we had to do was move the negative cabinet and set up shop.
I arranged the furniture in what seemed to be a good layout, putting two corner desks side by side, and set everything up. We had a working area to load the scanner’s film holders, an area for the scanner, and an area for the MacBook & drives. Other furniture and that existing shelving unit provided staging areas for sorting through negatives. And the photos.
Did I mention the photos yet?
Several boxes of old prints had been found just before we arrived, and they had to be sorted through to pull out any the might actually be of historical importance. Over half were stock shots from somewhere else and of no interest, but there were plenty of local origination photos worth capturing.
 |
| Sorting and organizing the photos. |
Working out the Details
- Channeling my Inner MacGyver
Once we started trying to really work with the process we had defined, some flaws became apparent. The most pressing of these was that it was difficult to quickly and precisely load the film holders.
“We need a light table!” I thought, and then began figuring out how to make one.
I finally hit on the idea of a desktop letter tray, and once I was able to convey what I was looking for, one appeared. It was too wide to directly support the film holder, so I had to come up with a fix using what was on hand - which happened to be cardboard bank storage boxes and packing tape. We had been using the boxes to sort various assets as needed.
So I cut up some cardboard and taped it together to make blocks that fit into the letter tray and held up the film holders.
 |
This shows the bottom of one of my homemade light table blocks, ready to be inserted
into the white-paper-lined letter tray in the background that I used for the light table.
The pink paper below that covered the desktop so we could keep the work area clean. |
All that was needed was a light, so that night Edgar took me to one of his favorite “has everything” stores and we found 2 small rechargeable LED lights. Perfect. You can see both the the blocks and the light in place in the photo below.
 |
| Note how well the LED light illuminates the white paper lining the tray! |
Once the workflow was humming, I started documentation for the process so that we would be consistent, and for training future crews.
The current version is
here.
The next problem was the negative cabinet itself. The drawers are too short for the negative envelopes, so they were sort of crammed in. Every time a drawer had been opened, the envelopes had been slightly damaged. And several of the drawers were somewhat off their tracks and would not open or close very easily.
Below are a couple of shots of the original state of the cabinet and negatives.
We moved the 35mm negatives from the bottom 2 drawers and put them into cardboard bank boxes, to be dealt with later.
 |
| A drawer full of 35mm negatives. |
This gave us some empty drawers we could now use to alleviate the crowding. We took out the drawers one by one, cleaned the inside of the cabinet, cleaned each drawer, and reloaded them with fewer negatives.
But before we did that, I did several things.
First, I made cardboard ramps for the back of each row in the drawers so the envelopes could be put in at a slant. yet still be fully supported. This was to avoid curling or otherwise damaging the negatives.
 |
| My ramps at the rear, and cardboard dividers. |
Then I made and inserted cardboard row separators where they were needed.
There was at least one metal divider in each drawer but more dividers were needed to help protect the negatives.
 |
| Before and after versions of the drawers holding the negative envelopes. |
Finally I unfolded some of the oversize file folders we had used to cover the desk work areas and taped them to the front edge of each drawer, like a hinge. This would prevent any more damage to the envelopes as drawers were opened or closed.
Once that was all in place, Edgar was able to go through and clean the various negative envelopes and choose which ones to start with - ones that were important in his opinion, or representative of a group.
 |
Edgar cleaning dirty build-up from the envelopes.
NOTE: that can of cleaner on top was only used for cleaning the cabinet! |
Ultimately, all the negatives will be represented in the database, and most of them will be scanned. But it was decided to start with an iterative approach, with Edgar setting priorities.
The last problem was what to do about the photo prints that had been added to the collection.
I first tried to use an old scanner they had at the UBC but it was not producing good results.
I asked if there was a digital camera somewhere that we could use, and Jacob said he would bring in and use his personal camera.
Now all we needed was some kind of copy stand…..
Edgar & I figured we could use a metal shelf and some magnets to hold up the photos - if we could find a metal shelf and some magnets. Jacob found and cleaned a small metal shelf from somewhere in the UBC (Jacob is a miracle worker!), and I managed to find some small magnets in a bookstore.
I taped a still-folded box to the wall to support the shelf’s weight, then taped the shelf to the wall so it would not fall over. This way, all the weight was supported vertically and the tape just had to keep it from falling forward.
 |
| You can see the tape on the sides of the box and metal shelf. |
I found some decorative magnets at a bookstore and, once we removed the magnets from their decorative plastic covers, we had what we needed.
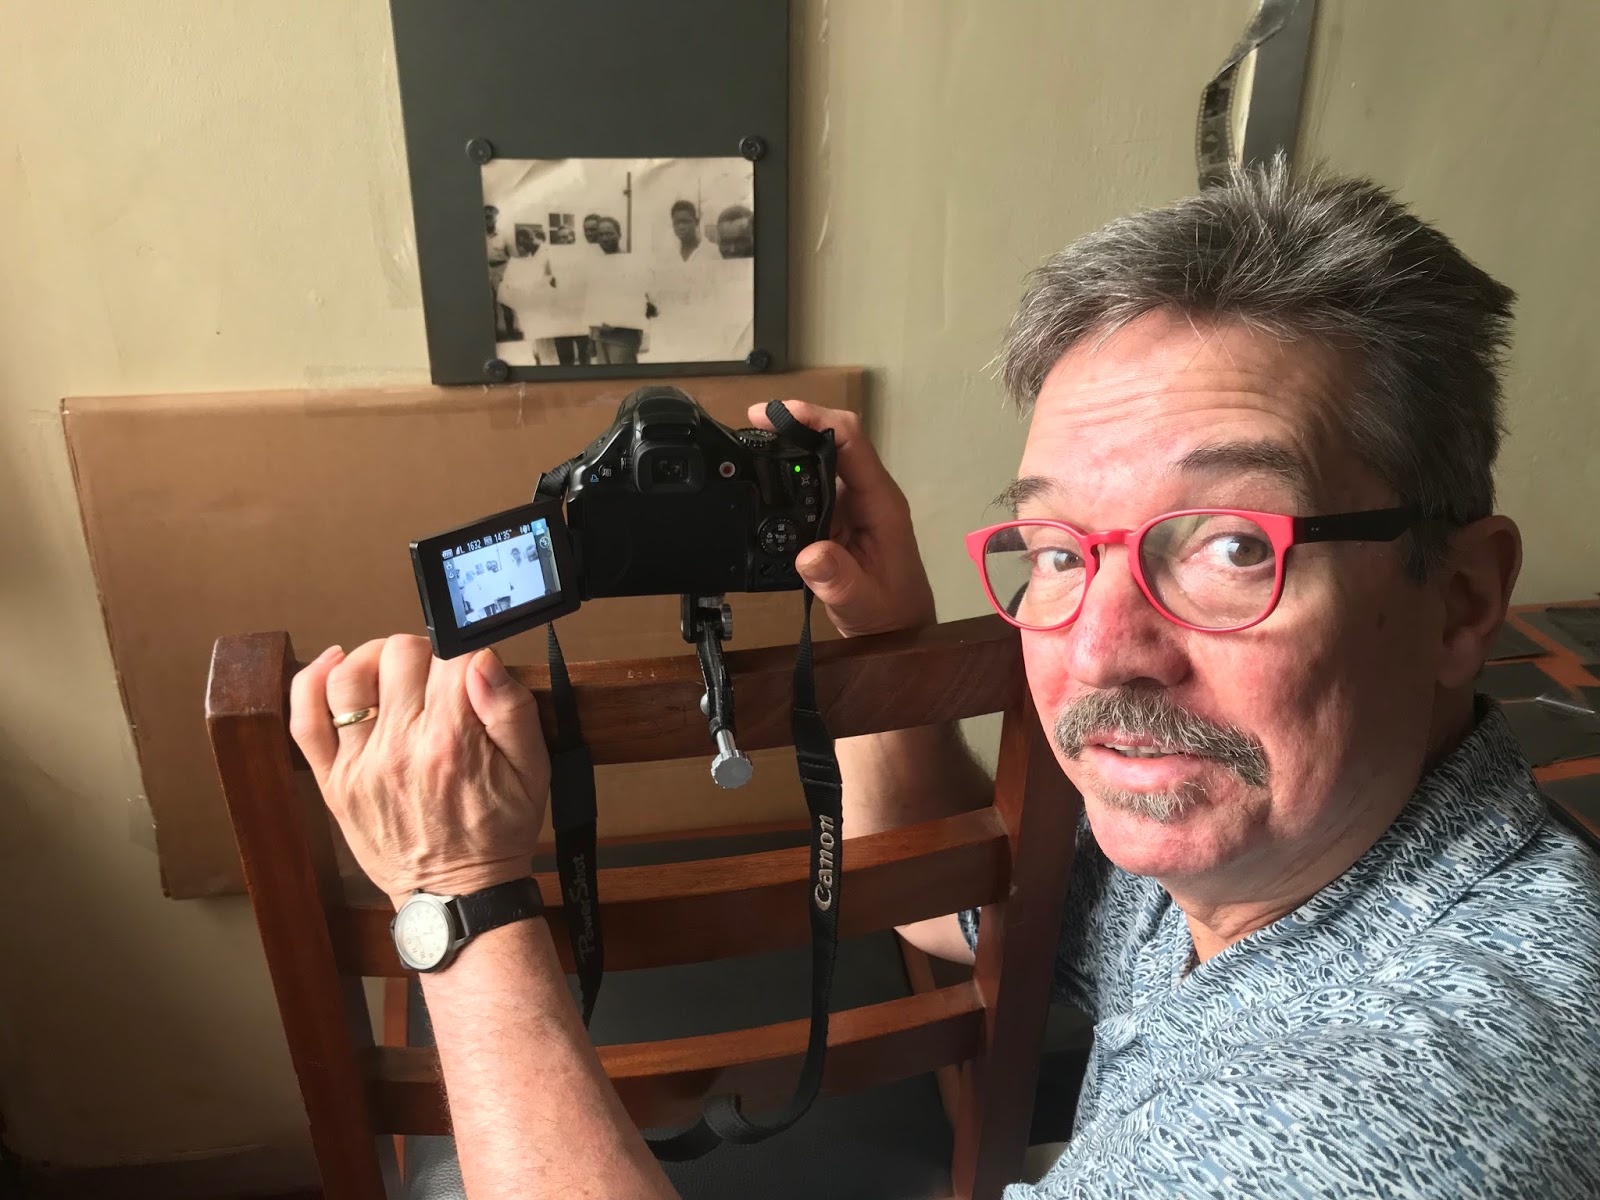
I got out a small c-clamp ‘tripod’ I had with me, clamped it to a chair, and voila - instant copy stand!
 |
| Me giving you a "users-eye view" of our copy setup. |
We had great natural light from the window, but the last thing that was needed was a way to diffuse any sunbeams that might slip in through openings in the vertical window blinds.
Again, what did we have that I could use? Cardboard, packing tape, and - paper towels. After a bit of "cardboard carpentry" we had a lovely diffusion screen between the photo wall and the window.
 |
| Top view of cardboard attachment showing how it was cut out and attached. |
 |
| View of the finished "Diffusion Wall". |
Finally everything was done. Even the power strip was labeled and secured.
 |
| The one labelled "NO" goes to another power strip. I know, you're not supposed to do that... |
We are Up and Running
This last photo is a panoramic view of the new workspace with everyone hard at work!
 |
| Clockwise from lower left: Scanner loading, Light table, Scanner, MacBook, Photocopy stand, Negative processing, Storage. |
One final tweak I made to the workflow was to institute a verbal notice between the Scan Loader and the Scan Operator. This was to minimize the downtime in case the scan operator was deep in the database and did not notice the scanner was ready.
With a project of this scale, where a single scan takes 3 minutes, all those seconds start to add up! We needed a good way to provide a clear "Ready!" signal.
But just saying "Ready" seemed so...uninteresting...
So I told them what NASA does in the USA, when preparing to launch a rocket.
(the obvious go-to, right?)
The Flight Director will go around the room one last time and ask for a "Go / No-Go" from each of his unit heads. And if things were good they would say "
Go Flight!"
So I asked Jimmy & Edmund to use that as a notification. They loved it, and in early April left me a voice message saying they were still using it. You can listen to it
here.
I have to say that this project really exercised my abilities.
We had no idea what resources we would find locally. We had a starting place but the path forward was to be forged on site.
We didn’t even know what sort of space we would have before I got there.
I simply had to rely on my many years of experience - and it was really fun!
One challenge after another came up, and we managed to find a way to make it work. I have to thank my friends (it was great to see you again Jacob & Malachi!) and colleagues at the UBC for making it all happen so spectacularly well! And it continues to work under the gentle guidance of Edgar.
Reports back from the field say that great progress is being made, and I would like to be able to visit again and see for myself. No plans yet, but hope springs eternal...
-t


